How to clean a Cricut Mat
by Karen Jones · March 30, 2022
A well-maintained Cricut mat can handle 40 or more cutting sessions before you need to replace it — but most crafters toss theirs after just 10. The culprit is almost always debris, lint, and oil buildup that slowly kills the adhesive. Learning how to clean Cricut mat surfaces the right way is one of the simplest skills you can pick up, and it saves real money over time. If you're new to die-cutting projects, start with our guide on how vinyl cutting works to understand why mat condition is so critical for clean, precise results.

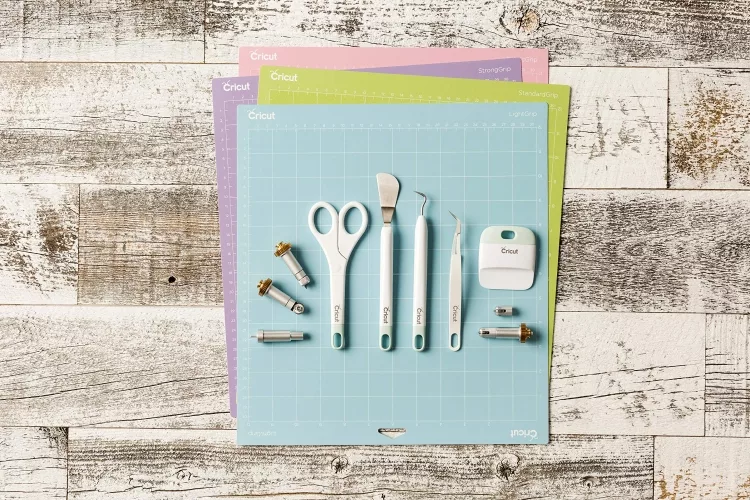
Cricut sells four mat types: LightGrip (blue), StandardGrip (green), StrongGrip (purple), and FabricGrip (pink). Each is designed for a specific range of materials. Paper and lightweight cardstock go on the blue mat. Vinyl, iron-on transfers, and medium cardstock belong on the green. The purple handles heavy materials like chipboard and thick leather. The pink is made exclusively for fabric. Understanding which mat you're working with matters because the cleaning approach varies between them — use the wrong method and you can permanently strip the adhesive.
The good news is that most of what you need to clean a Cricut mat is already in your home. This guide covers everything — from a quick post-session wipe to a full deep clean — plus tips on restoring stickiness, fixing common problems, and storing your mats properly. Browse our printer guides for more crafting and printing tutorials alongside this one.
Contents
Step-by-Step: How to Clean Your Cricut Mat
The process isn't complicated, but rushing it — or using the wrong method — can permanently damage the adhesive. Follow these steps based on your mat type and you'll get consistent results every time.
Cleaning a LightGrip or StandardGrip Mat
These are the mats most crafters use every day. They pick up paper fibers, vinyl scraps, and fine dust quickly. Here's how to clean them without damaging the surface:
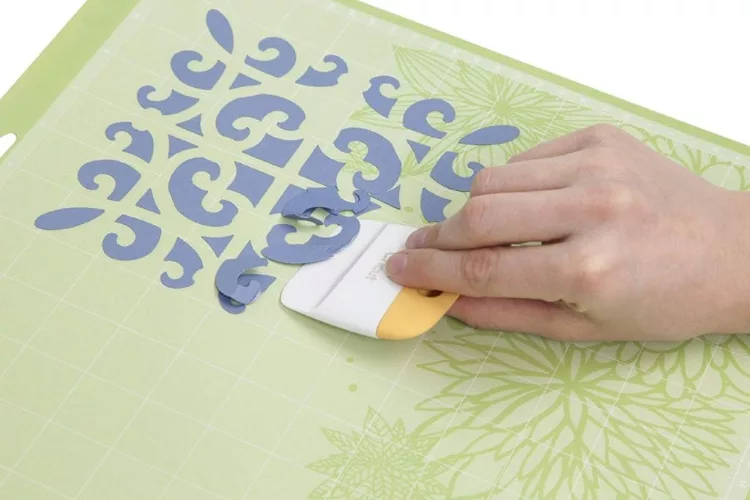
- Remove large debris first. Use the Cricut scraper tool or a plastic card to gently lift stuck-on scraps. Work at a low angle to avoid gouging the adhesive layer.
- Roll a lint roller over the entire surface. This pulls off paper fibers, glitter, and fine particles the scraper misses. Use firm, even pressure and overlap your passes.
- Rinse under lukewarm running water. Hold the mat adhesive-side up under a gentle stream. Let it soak for 30–60 seconds without scrubbing yet.
- Scrub gently with a soft brush. A baby toothbrush or soft dish brush works well. Use small circular motions across the whole surface. Avoid anything abrasive — no stiff nylon, no wire bristles.
- Rinse again until the water runs clear. All soap residue needs to come off or it will interfere with stickiness.
- Air dry flat, adhesive side up. This takes 20–30 minutes. Don't pat it dry with a towel — you'll leave fibers embedded in the adhesive.
Once dry, the stickiness usually bounces back. That's the adhesive reactivating as moisture evaporates. If it still feels weak immediately after drying, give it another 15 minutes — it's often not fully dry yet.
Cleaning a StrongGrip Mat
The purple StrongGrip mat handles heavy materials like chipboard, thick leather, and balsa wood. That means it picks up some seriously stubborn residue. The rinse-and-scrub method still works, but you may need a few extra steps:
- Use a slightly stiffer brush — still no metal bristles, but a firmer nylon dish brush is fine.
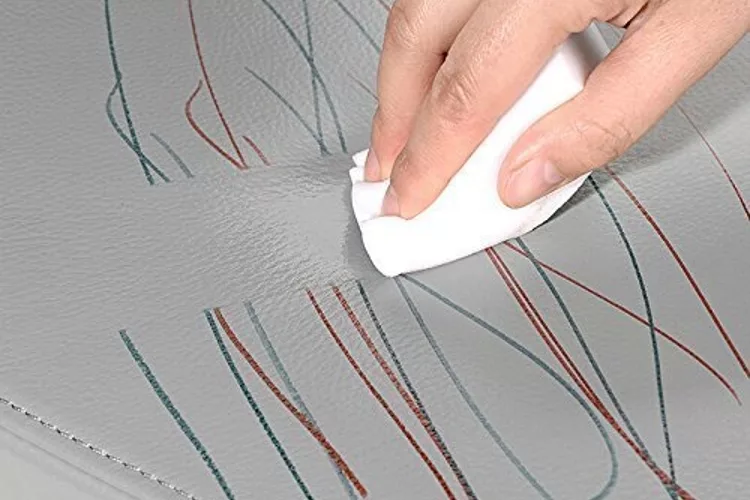
- For sticky residue that won't budge, dampen a magic eraser and gently rub the affected spots. Use light pressure — this method does remove some adhesive along with the debris, so don't overdo it.
- If there's significant buildup, soak the mat in a shallow tray of warm water for 5 minutes before scrubbing. This softens embedded debris and makes it much easier to remove.
- Rinse thoroughly and set flat to air dry.
Cleaning a FabricGrip Mat
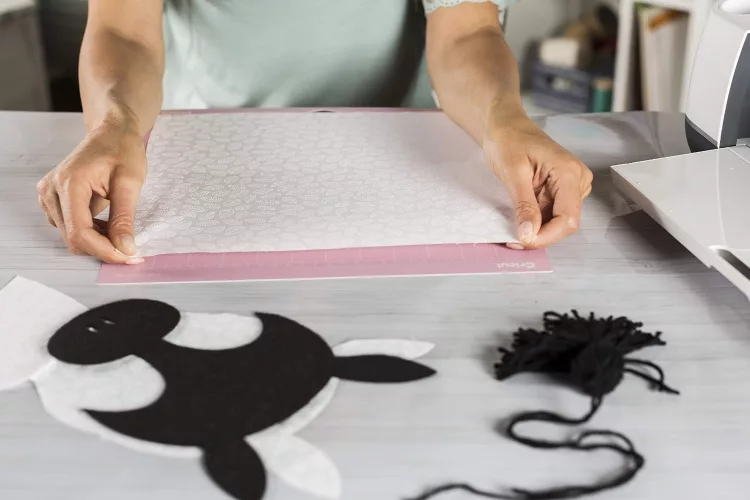
The pink FabricGrip mat is the most delicate of the four. It holds fabric without leaving residue on your material — which means the adhesive chemistry is different from the other mats. Water and solvents can degrade it quickly.
For the FabricGrip mat, stick to dry cleaning only:
- Lint-roll the surface after every session — this is the primary cleaning method for this mat.
- Use the scraper or your fingertips to gently peel away stubborn fabric bits.
- For specific spots, dab with a small piece of masking tape rather than wiping.
- Never use baby wipes, water, or any solvent-based product on this mat — they will permanently strip the adhesive.
The Right Tools and Supplies
You don't need a dedicated mat-cleaning kit. Most of what works is already in your home. That said, a few specialty items make the whole process faster and more effective.
Basic Cleaning Supplies
- Lint roller — Your first line of defense after every project. Always use it before wet cleaning to remove loose debris.
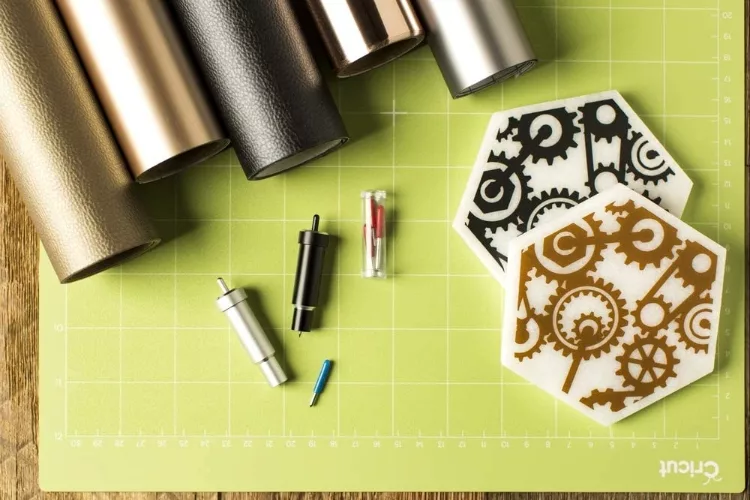
- Plastic scraper or spatula — Lifts cut pieces without damaging the adhesive. The Cricut scraper tool is ideal, but any flat plastic card works.
- Soft-bristled brush — A baby toothbrush or soft dish brush for the wet-wash step. Anything stiffer risks scratching the adhesive surface.
- Mild dish soap — A single drop in warm water helps cut through oil and heavier residue. Avoid bleach, harsh degreasers, or anything antibacterial.
- Unscented baby wipes — A quick alternative to a full wash for light dust and fingerprint oils. Wipe gently and let air dry.
Specialty Items Worth Having
- Magic eraser — Works well on stubborn spots on LightGrip and StandardGrip mats. Use it sparingly — it's slightly abrasive and does thin the adhesive layer over time.
- Painter's tape or Scotch tape — For dabbing at specific debris spots without spreading them around.
- Repositionable adhesive spray — Used to re-stick a mat that's lost grip after cleaning. Krylon Easy-Tack, Zig 2-Way Glue, and Cricut's own spray all work. More detail on this in the tips section below.
- Tweezers — Great for pulling tiny threads, glitter, and paper fibers out of the adhesive grid when a brush can't reach them.
Cleaning Method Comparison
Not every method works for every mat. Use this table to match your cleaning approach to the mat type and level of buildup:
| Cleaning Method | LightGrip (Blue) | StandardGrip (Green) | StrongGrip (Purple) | FabricGrip (Pink) |
|---|---|---|---|---|
| Lint roller | ✓ Best first step | ✓ Best first step | ✓ Best first step | ✓ Primary method |
| Plastic scraper | ✓ Light pressure | ✓ Light pressure | ✓ Firm pressure | ✓ Very gentle only |
| Warm water rinse | ✓ Effective | ✓ Effective | ✓ Soak if needed | ✗ Avoid |
| Soft brush + mild soap | ✓ Deep clean | ✓ Deep clean | ✓ Stiffer brush OK | ✗ Avoid |
| Unscented baby wipes | ✓ Quick wipe | ✓ Quick wipe | ✓ Light dirt only | ✗ Avoid |
| Magic eraser | ⚠ Use sparingly | ⚠ Use sparingly | ✓ Stubborn spots | ✗ Avoid |
| Adhesive spray (re-stick) | ✓ When grip fails | ✓ When grip fails | ✓ When grip fails | ✗ Not recommended |
Routine Mat Care Between Sessions
Daily habits matter more than any deep-clean recovery method. A few minutes of attention after each project prevents the kind of heavy buildup that's hard to reverse. Small, consistent care beats occasional emergency repairs every time.
After Every Use
You don't need to wash your mat after every single cut. Instead, build these quick habits into your workflow:
- Run a lint roller over the entire surface before putting the mat away — this alone doubles how long your mat stays effective.
- Use the scraper to remove any visible cut pieces immediately. Don't let scraps sit and embed into the adhesive overnight.
- Replace the clear protective cover sheet before storing. It shields the adhesive from dust, pet hair, and airborne debris.
- Store the mat flat. Never fold it — folds create creases that your Cricut blade will follow incorrectly on the next cut.
- Keep it away from direct sunlight and heat sources when stored. UV exposure degrades adhesive over time.
The Weekly Deep Clean
If you're cutting regularly — a few sessions per week — a proper wash once a week keeps adhesive performance where it needs to be. Here's a simple routine to follow:
- Lint-roll the surface first to pull off loose debris before getting anything wet.
- Run warm water over the adhesive side while gently rubbing with a soft brush. No soap needed for light maintenance cleaning.
- Add a small drop of dish soap if the mat is visibly dirty or tacky with oil. Work it in gently in small circles.
- Rinse completely until the water runs clear and no soap bubbles remain.
- Set flat on a clean towel to air dry, adhesive side up, for at least 20 minutes.
- Re-cover with the protective sheet before storing.
This adds only 5–10 minutes to your session. If you use your Cricut for iron-on vinyl projects — custom shirts, tote bags, and similar items — clean cuts on a maintained mat are especially important for detail work. Our comparison of heat transfer paper vs. vinyl breaks down which materials put the most stress on your mat and how to plan accordingly.
Pro Tips to Extend Mat Life
Cleaning extends mat life, but smart usage habits prevent heavy wear in the first place. These tips come from experienced crafters who've figured out how to get the most out of every mat.
Preventing Debris Buildup
- Rotate your cutting area. Most people always cut in the same spot — usually the center. Shift your material placement regularly to distribute wear across the full surface and extend overall adhesive life.
- Wash your hands before handling the mat. Skin oils are one of the most common reasons adhesive fails prematurely. It takes five seconds and makes a real difference over dozens of sessions.
- Weed vinyl and paper scraps over a trash can, not over your mat. Tiny confetti pieces fall into the adhesive grid and are tedious to remove later.
- Use the right mat for each material. Running heavy chipboard on a LightGrip mat overstresses the adhesive and leaves residue the mat wasn't designed to handle.
- Avoid touching the adhesive zone with your fingers when placing or removing materials. Handle your mat by the edges only.
If you use your Cricut for fabric appliqué or patch work, our guide on how to attach patches without sewing covers techniques that pair naturally with FabricGrip mat projects — including how to minimize fiber transfer onto the adhesive surface.
Re-Sticking a Mat That's Lost Its Grip
When cleaning alone isn't enough to bring back grip, you can re-apply adhesive. This technique works well on LightGrip and StandardGrip mats that are structurally sound but have lost their tack. Here's how to do it correctly:
- Clean the mat thoroughly and let it dry completely — 100% dry. Any moisture under the adhesive spray will cause it to bubble.
- Mask off the half-inch border around the edge with painter's tape. You don't want adhesive near the edges or it will stick to your Cricut's rollers and feed mechanism.
- Apply a thin, even coat of repositionable adhesive spray from about 10–12 inches away. One light pass is enough. Hold the can steady and move in one direction.
- Let it sit for 10–15 minutes until the surface feels tacky — not wet.
- Remove the masking tape and test with a scrap piece of the material you'll be cutting.
The single biggest mistake people make here is spraying too much. More adhesive does not mean more grip — it means materials that tear when you try to remove them. If you're wondering how adhesive chemistry works in general, Wikipedia's overview of adhesive types is a useful reference for understanding the difference between permanent and repositionable formulations.
If you're running a small crafting business and managing multiple tools, our breakdown of heat press machine costs can help you put mat replacement expenses in context alongside your other equipment budget.
Fixing Common Mat Problems
Even with good habits, things go wrong. Here's how to work through the most common mat issues you'll encounter.
Mat Won't Hold Materials
This is the most common complaint. It's usually fixable. The cause is almost always one of three things:
- The adhesive is clogged with debris. Do a full deep clean as described above. The stickiness often returns once the surface is cleared — debris acts like a barrier between your material and the actual adhesive.
- The mat has dried out from improper storage. A wash-and-dry cycle often helps reactivate the adhesive. If not, try a light coat of repositionable spray.
- The adhesive layer is genuinely worn down. After many uses, the adhesive does thin out permanently. At that point, re-adhering with spray is your best option before considering replacement.
Mat Is Too Sticky
A brand-new mat — or one you've just re-stuck — can be aggressively tacky, tearing delicate materials like tissue paper or thin vinyl when you try to remove them. This is a well-known quirk that most experienced crafters have dealt with.
The fix is straightforward: press a clean cotton t-shirt (or similar woven fabric) onto the mat and lift it off firmly, 4–5 times. This deliberately reduces adhesive transfer to the surface and dials the grip down to a more workable level. Crafters call this "breaking in" a new mat, and it's a completely normal part of the workflow. Our guide on choosing the right t-shirt for printing covers fabric types that work well for this — as well as for finished iron-on and heat transfer projects.
Mat Has Deep Grooves or Cuts
If your Cricut blade is cutting too deeply, it will score the mat surface and leave visible grooves. Over time these affect how flat your material lies, which causes shifting and cutting inaccuracies.
- Dial back your blade depth — the blade should cut cleanly through the material but leave only a hairline mark on the mat, not a visible groove.
- Minor shallow grooves can be worked around by shifting your material placement to use fresh areas of the mat.
- Deep grooves that affect surface flatness indicate structural damage to the mat base. No amount of cleaning will fix that. Replacement is the right call.
Making Your Mats Last: A Long-Term Plan
Thinking about your mats the same way you'd think about any crafting tool — with intentional care and a realistic replacement schedule — keeps your projects running smoothly and your costs predictable over time.
Storage Best Practices
How you store mats between sessions is just as important as how you clean them. Poor storage is one of the main reasons mats lose grip faster than they should.
- Always replace the protective cover sheet after each session. If you've lost the original, cut a piece of silicone parchment paper to size — it works just as well.
- Store mats horizontally when possible. Standing them vertically for extended periods causes bowing, especially in warm rooms.
- Keep them in a cool, dry space. Extreme heat softens the adhesive unevenly; sustained cold can make it brittle. Room temperature is the sweet spot.
- Label each mat by type if you own multiple grips. A small strip of washi tape on the non-adhesive side works perfectly and peels off cleanly.
- Don't stack heavy objects on top of stored mats. Pressure creates permanent impressions in the adhesive surface over time.
When to Replace vs. When to Restore
Not every struggling mat is worth saving. Here's a straightforward framework to help you decide:
Try to restore if:
- The mat is less sticky but otherwise in good shape — no deep grooves, no warping, no surface damage.
- A thorough cleaning brings back at least partial stickiness.
- The mat has moderate use and you haven't re-adhered it more than once before.
Replace when:
- There are deep blade grooves that cause materials to shift or lift during cutting.
- The mat is visibly warped or no longer lies flat inside the machine.
- You've re-adhered it twice already with diminishing returns each time.
- Cutting accuracy has declined even after you've verified correct blade depth and pressure settings.
A single Cricut mat typically costs between $10 and $20 depending on size and grip level. When you factor in the cost of ruined specialty vinyl, premium heat transfer material, or fabric that gets mangled on a dying mat, replacing it on time is the economical choice. If you're also weighing your equipment setup more broadly, our guide on how to choose the right heat press walks through what to look for in a workhorse machine that pairs well with a well-maintained Cricut setup. And if you're comparing production methods across your crafting or printing workflow, our heat press vs. screen printing comparison lays out the trade-offs at different scales of production.
Frequently Asked Questions
How often should you clean a Cricut mat?
It depends on how often you use it and what materials you cut. For regular users, a quick lint-roll after every session and a full water wash every week or two is a solid routine. If you're cutting fibrous materials like felt, glitter cardstock, or burlap, clean more often — these leave behind debris that embeds quickly.
Can you use rubbing alcohol to clean a Cricut mat?
It's generally not a good idea. Rubbing alcohol (isopropyl alcohol) can dissolve or degrade the adhesive, especially on LightGrip and FabricGrip mats. Warm water, mild dish soap, and unscented baby wipes are safer and get the job done just as effectively for most cleaning tasks.
Why does my Cricut mat lose stickiness so fast?
The most common reasons are touching the adhesive surface with bare hands (skin oils break down the tack quickly), skipping the protective cover sheet between sessions so dust accumulates, and cutting materials that shed a lot of fine debris like glitter paper or felt. The daily habits covered in this guide — lint rolling, covering the mat, washing your hands — make a measurable difference in how long each mat lasts.
Can you use Goo Gone or WD-40 to clean a Cricut mat?
Avoid both of these. Goo Gone and WD-40 are petroleum-based and designed specifically to remove adhesive — which is the opposite of what you want here. Using either will strip the adhesive from your mat permanently. Warm water and a soft brush handle the vast majority of cleaning jobs safely.
Is it safe to put a Cricut mat in the dishwasher?
No. The heat and harsh detergents inside a dishwasher will permanently damage the adhesive and can warp the plastic mat base, making it unusable. Always hand-wash your mat with warm water and mild soap, then air dry it completely before using or storing it.
Key Takeaways
- Knowing how to clean Cricut mat surfaces correctly — and using the right method for each mat type — can extend mat life from around 10 uses to 40 or more.
- The FabricGrip mat should never be washed with water; lint rolling and gentle scraping are the only safe cleaning methods for the pink mat.
- Consistent daily habits — lint rolling after every session, replacing the protective cover, and keeping hands clean — prevent buildup far more effectively than any deep-clean recovery method.
- When cleaning and re-adhering no longer restore grip, or when the mat shows deep grooves or warping, replacement is the right call rather than another round of cleaning attempts.
 |  |  |  |

About Karen Jones
Karen Jones spent seven years as an office manager at a mid-sized financial services firm in Atlanta, where she was responsible for a fleet of more than forty inkjet and laser printers spread across three floors, managed ink and toner procurement contracts, and handled first-line troubleshooting for connectivity failures, paper jams, and driver conflicts before escalating to IT. That daily exposure to printers from Canon, Epson, HP, and Brother under real office conditions gave her a practical command of setup, maintenance, and common failure modes that spec sheets never capture. At PrintablePress, she covers printer how-to guides, setup and troubleshooting tips, and practical advice for home and office printer users.


Get some FREE Gifts. Or latest free printing books here.
Disable Ad block to reveal all the secret. Once done, hit a button below
| | | |